Backing Up a PrestaShop Website
This tutorial is going to show you how to back up a PrestaShop site from command line in SSH. It is highly recommended that you make regular backups of your PrestaShop site so you can easily restore it if something unexpected happens.
To take a backup of your site, you need to back up both your PrestaShop files and PrestaShop database.
Note: For security reasons, only the accounts have passed our verification will be granted permission to the Shell / SSH service. If you would like to enable it, please update your billing information. Our staff will finish verifying your information within 2 hours.
Back Up PrestaShop Files
1. Locate target application
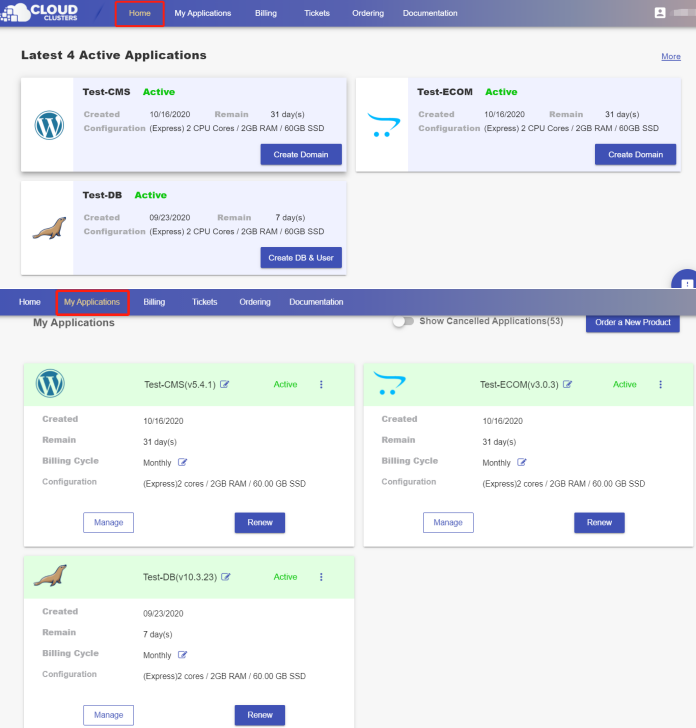
Log in to the Control Panel and locate your target deployment on the Home page or the My Applications page.

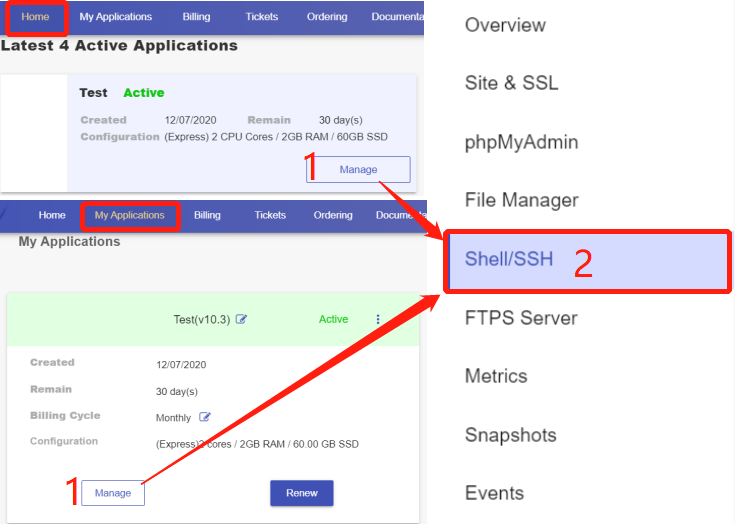
2.Go to the Shell / SSH page
Go to the Shell / SSH page by clicking the "Manage" button on the Home page or the My Applications page.
3. Launch a shell session
Click the “Connect” icon on the Shell / SSH page to launch the command-line interface.

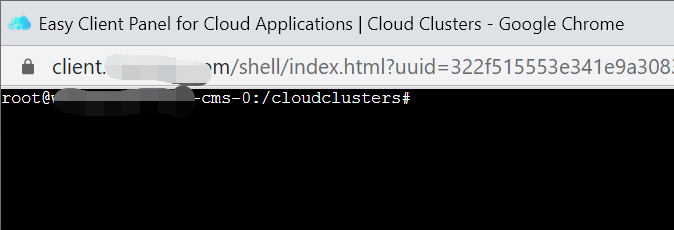
For security reasons, only the accounts have passed our verification will be granted permission to the Shell / SSH service. If you would like to enable it, please update your billing information. Our staff will finish verifying your information within 2 hours.

First navigate (using cd) to the directory you want to create the backup in. Let's say, you want to backup the webiste "test".
Type in the command
tar -vcf yourbackupfilename.tar.gz /directory/path

After the backup process completes, use command ls to check the backup file.

4. Export files
You can download the file on your local machine using FTPS. For details, please take a look at the documentation.
Back Up PrestaShop Database
1. Locate your target deployment
Log in to the Control Panel and locate your target deployment on the Home page or the My Applications page.
2. Navigate to the “phpMyAdmin” page
Click the "Manage" button on the Home page or the My Applications page to go to the phpMyAdmin page.
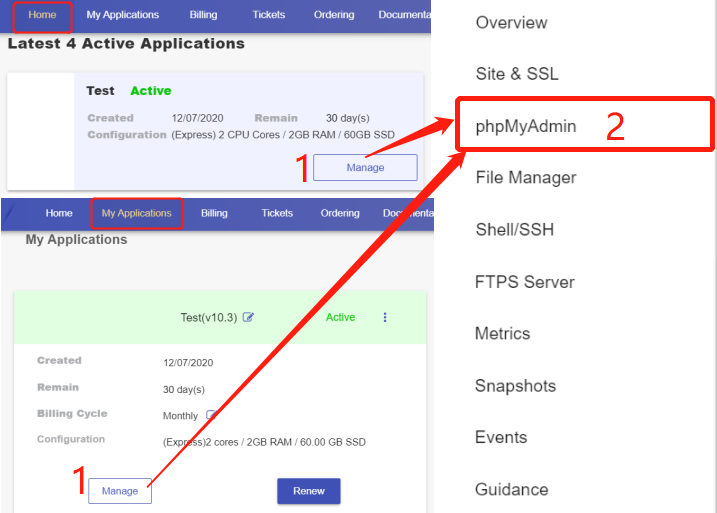
3. Back Up the Database of Your Site
Click “Launch” to go to the login interface of phpMyAdmin.

From the database drop-down on the left, select the database you would like to back up.
Click “Export” in the navigation bar at the top.
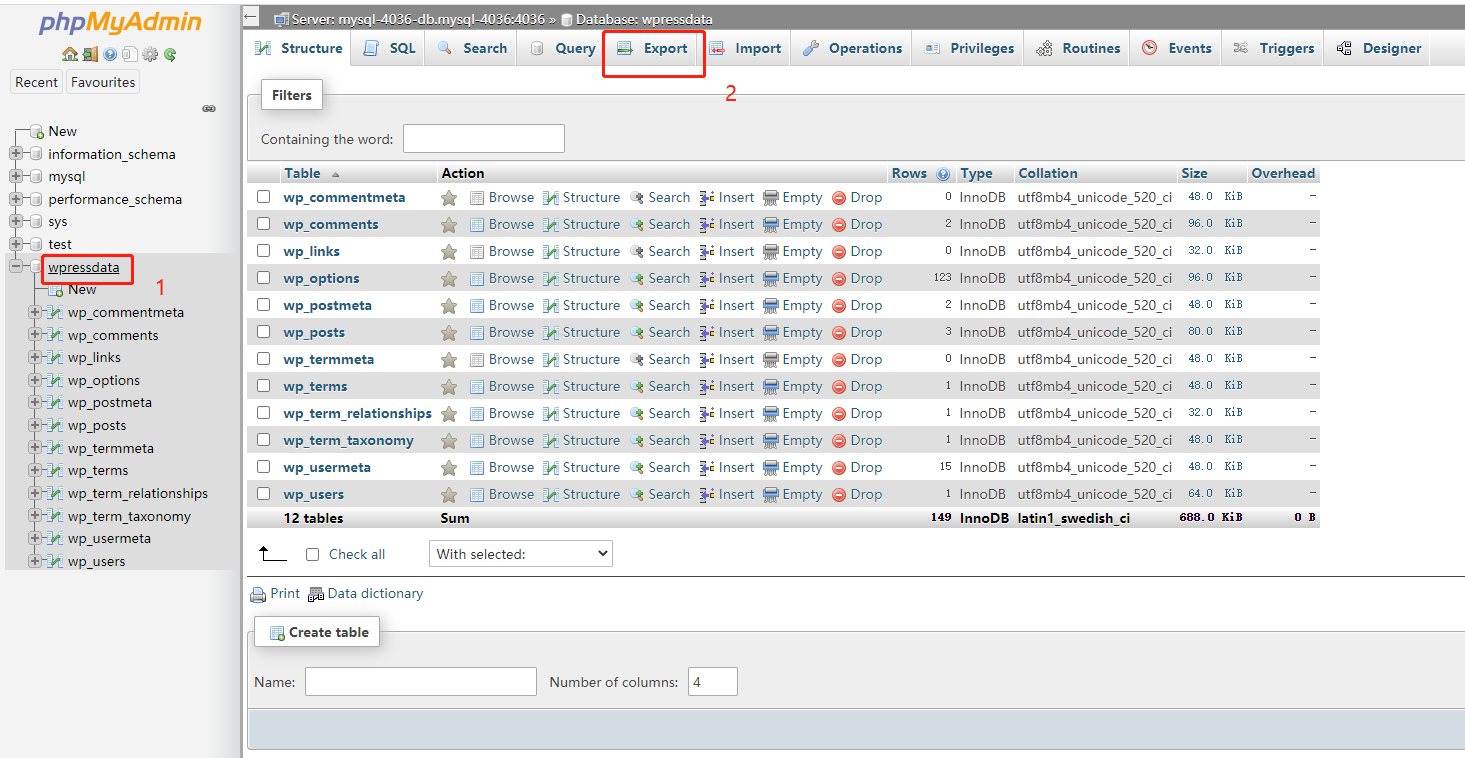
Choose the Export method as "Quick" or "Custom" and the Format as "SQL", followed by hitting the "Go" button. You are downloading a backup file to your local machine.
Using a Quick export

Using a Custom export
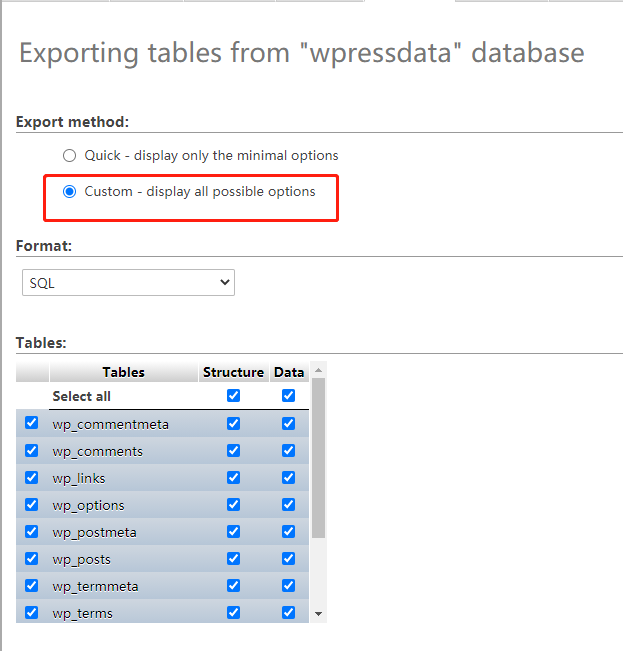
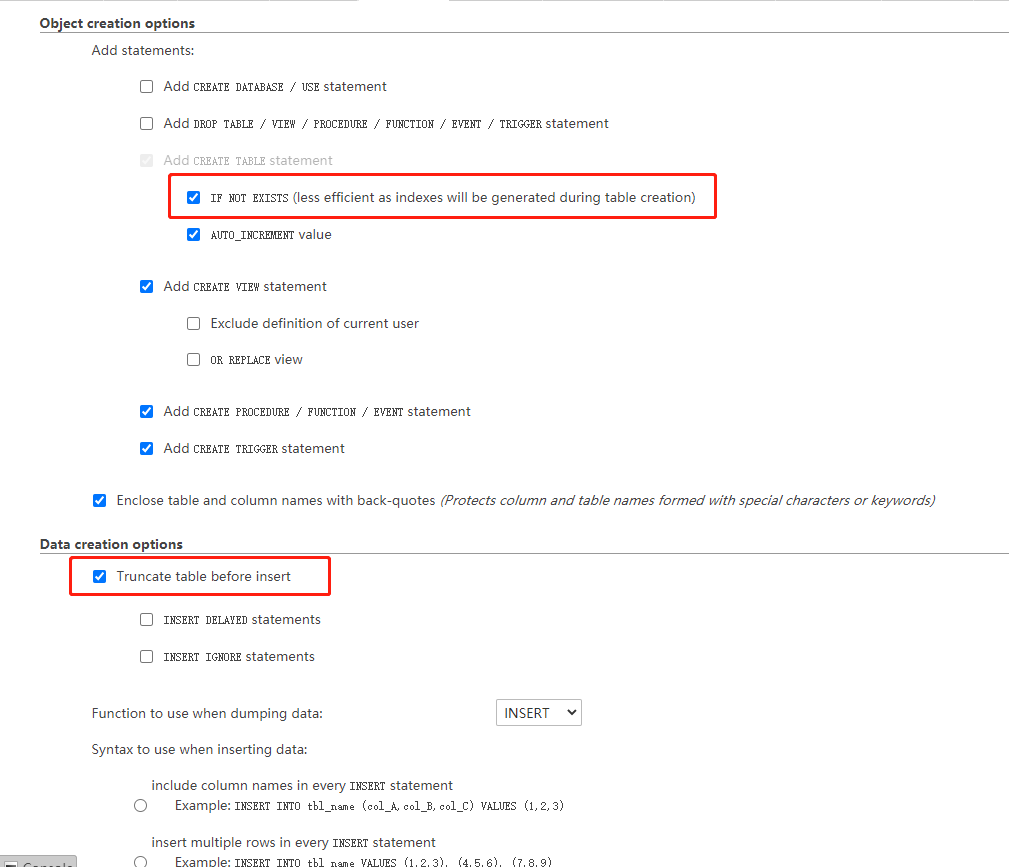
Besides the default ticked-on options, please tick on the “IF NOT EXISTS” under Objection creation options and the “Truncate table before insert” option under Data creation options. This is to make sure that your target database only includes the data from your backup file after the restoration.
